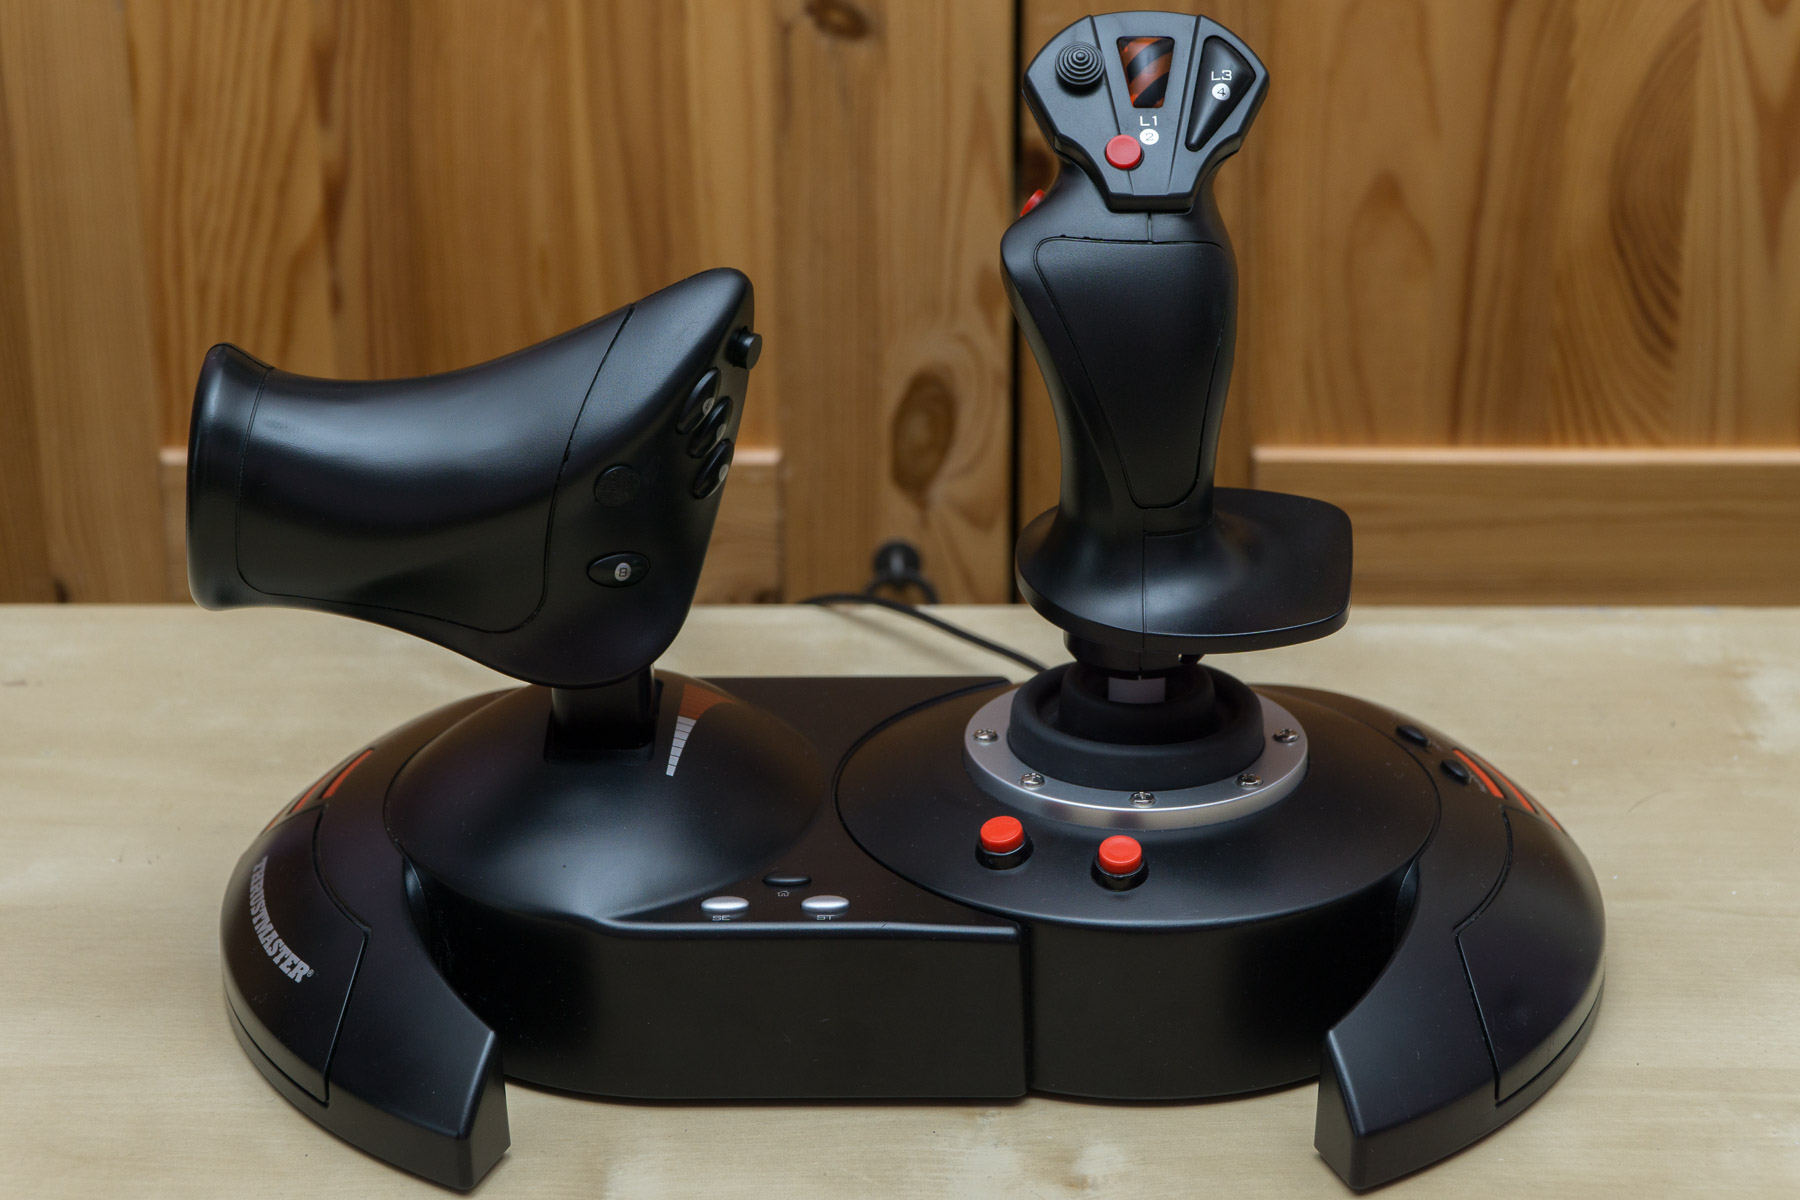
The trusty old Thrustmaster Hotas X is great starter joystick for flight simulation enthusiasts, but it has only 12 buttons… Here’s how you can upgrade it.
Buttons
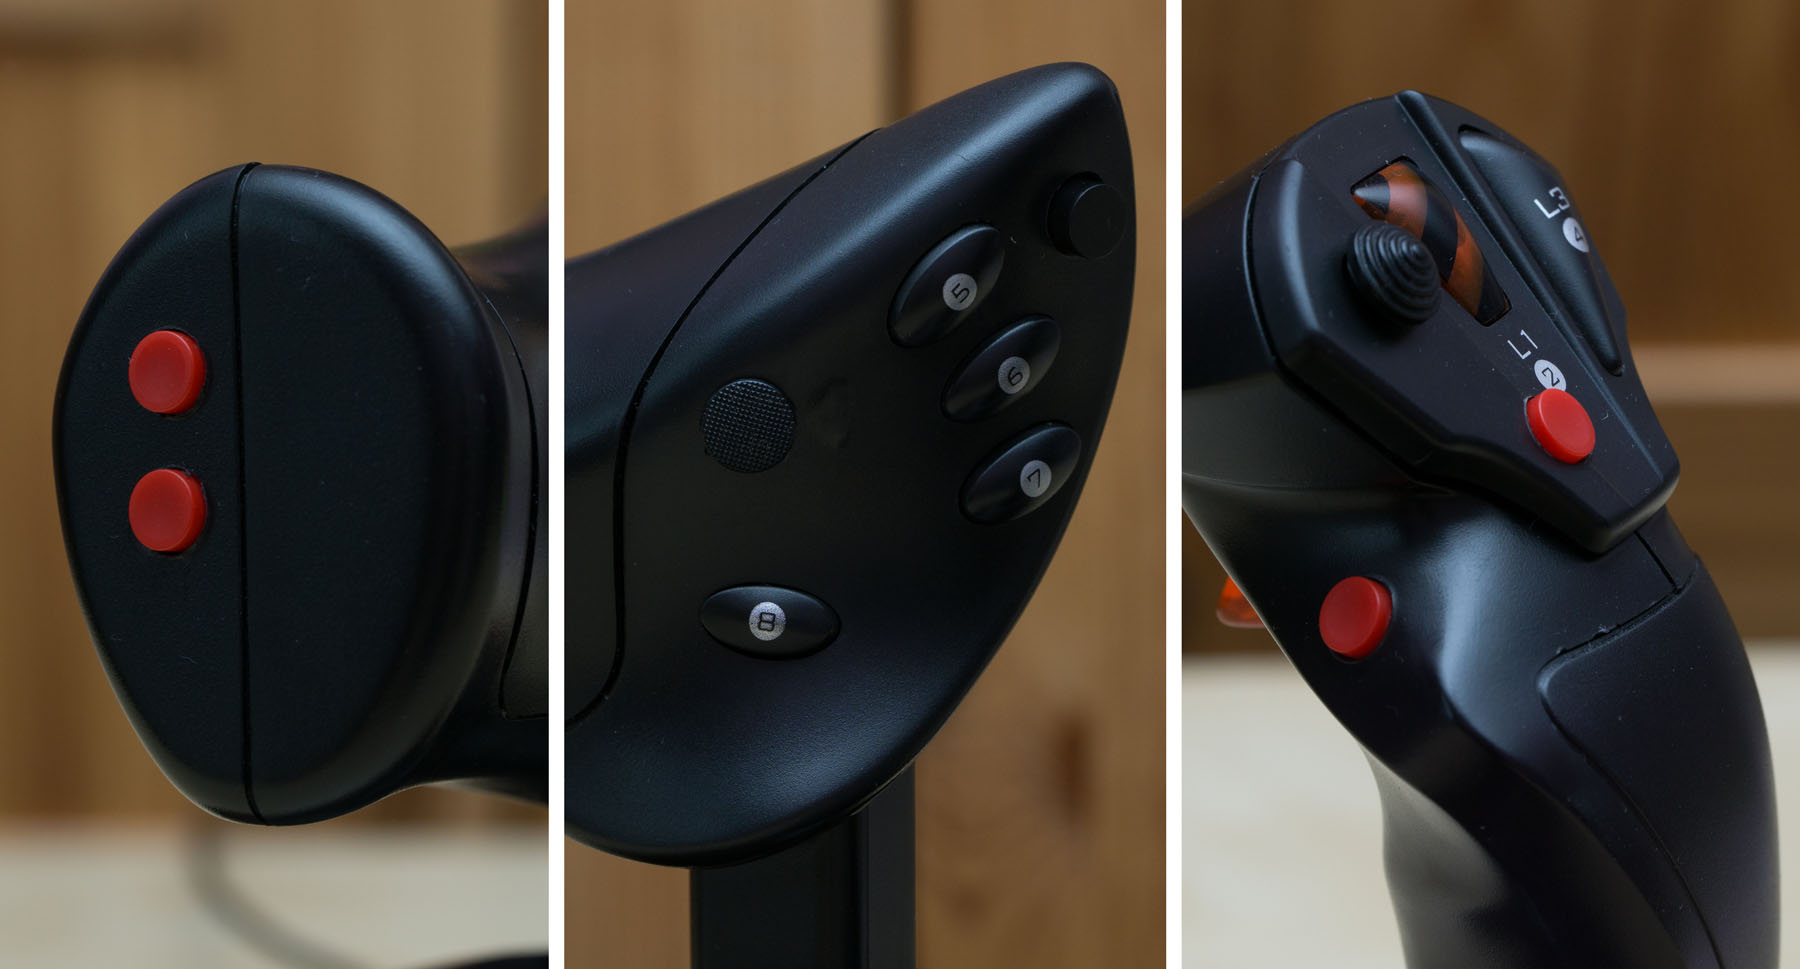
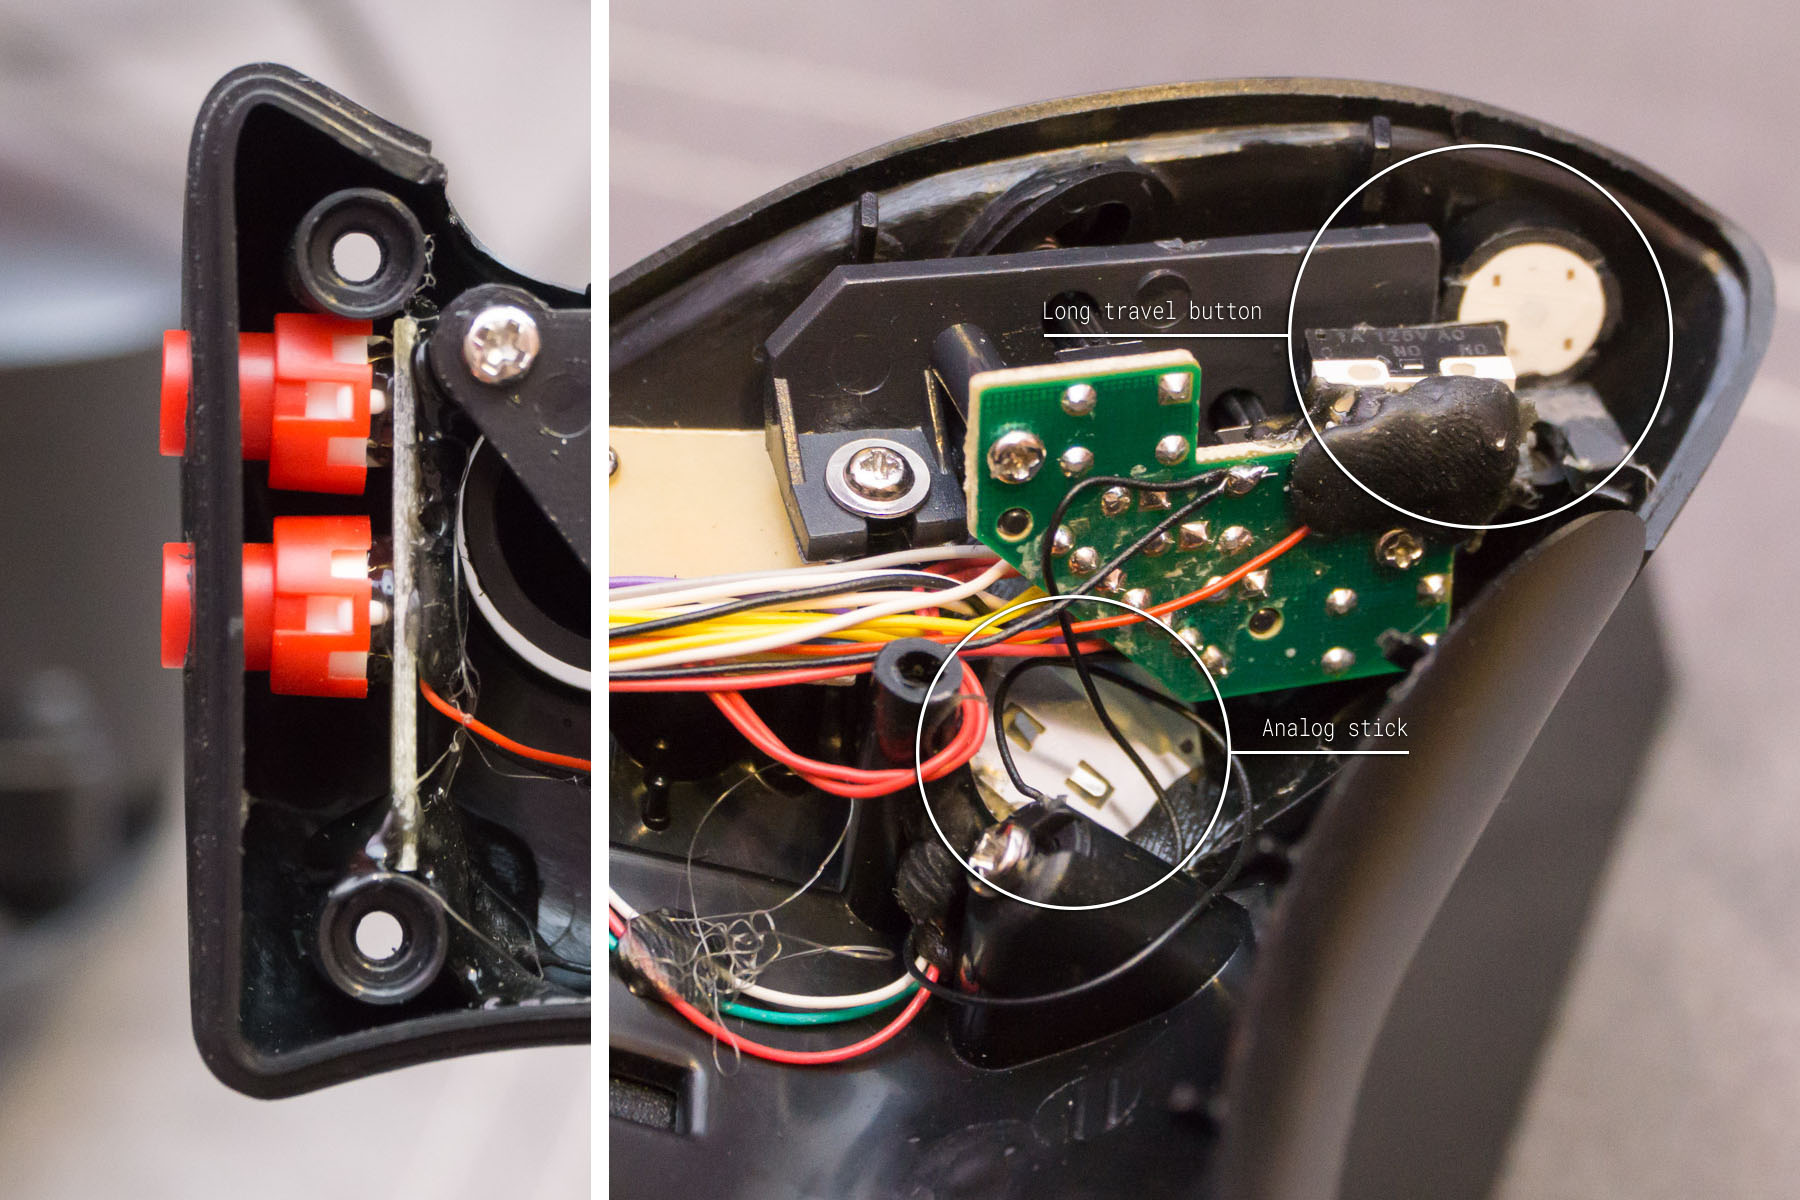
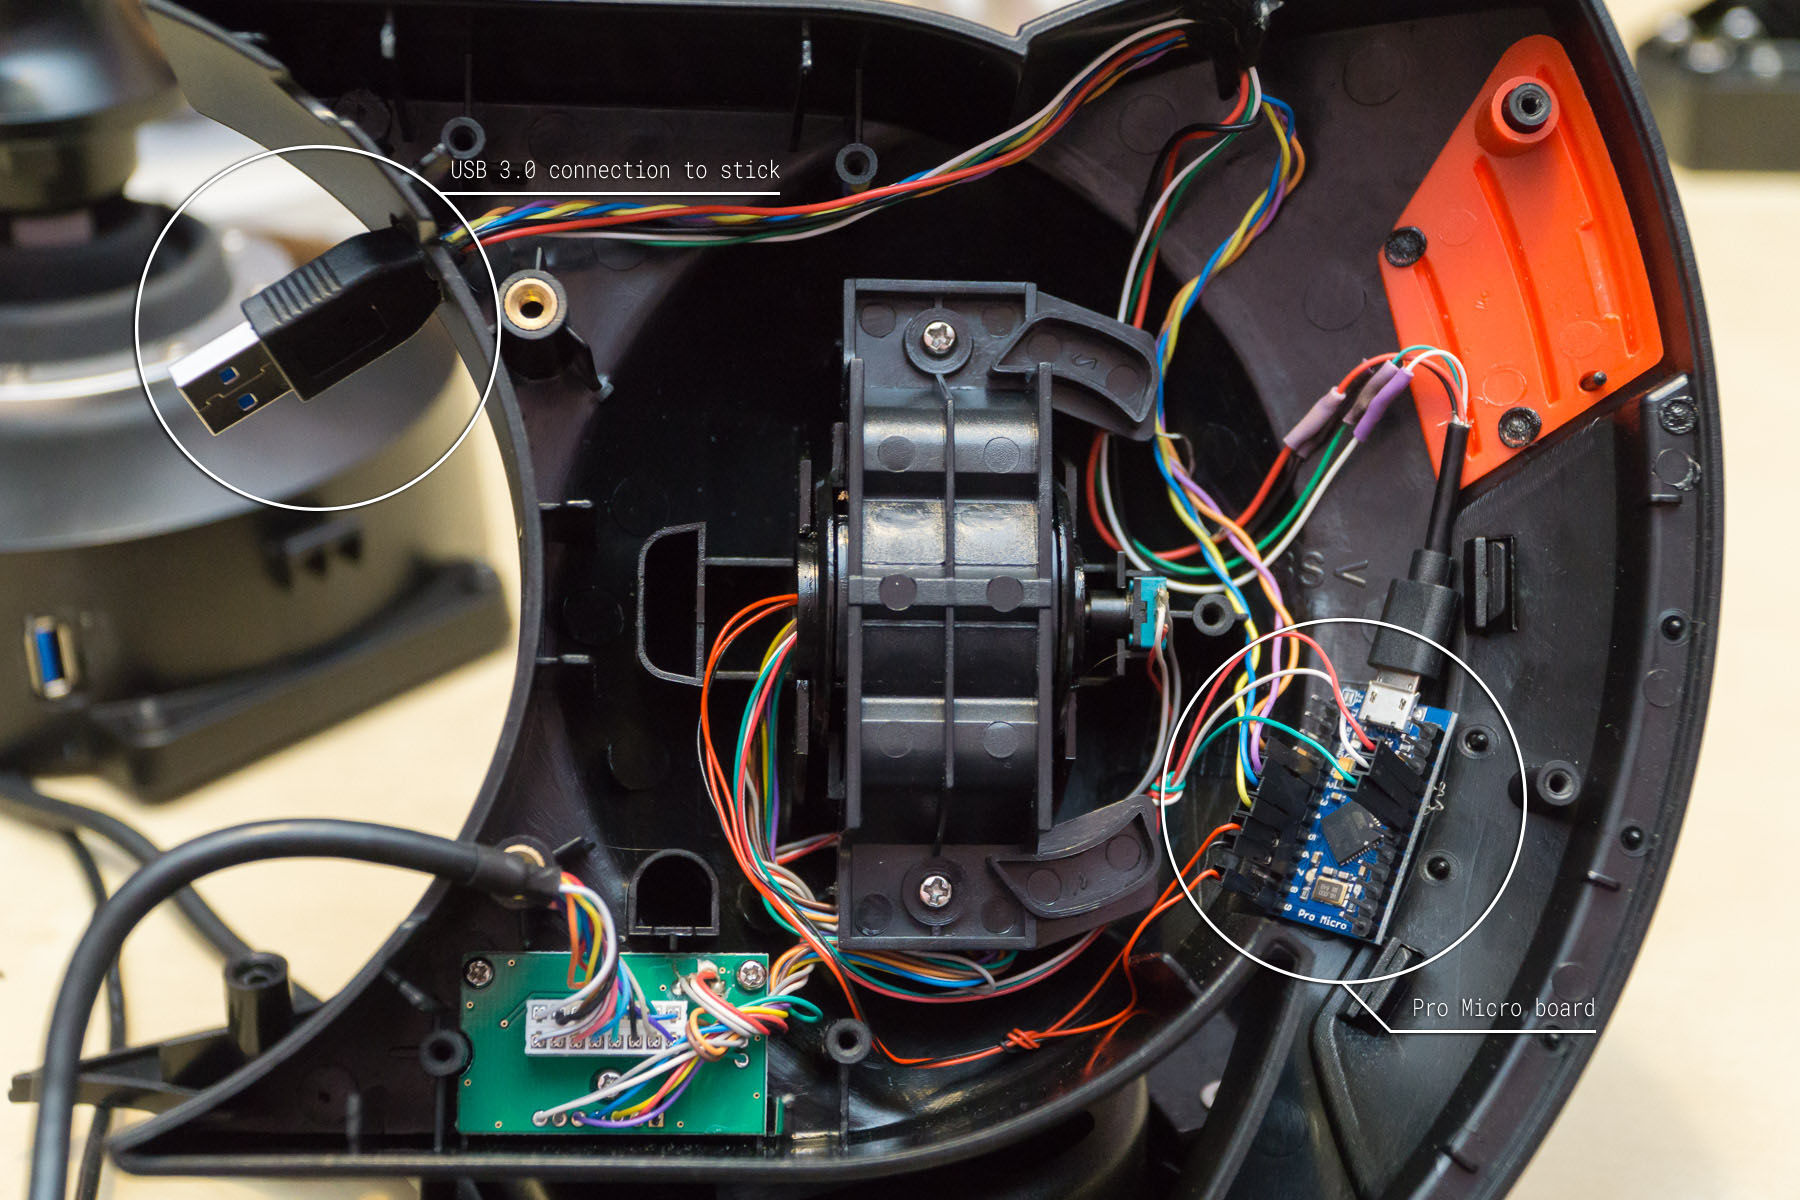
This joystick is easy to disassemble and quite serviceable. It has plenty of room inside for upgrades and the plastic is thick and easy to work with. I have put inside all the spare buttons I had left over from other projects. Four of them were really nice DT6 tact switches intended for board mounting, one on the edge of the throttle is a cut off button pushing a spring tack switch, and two on the joystick base were really ugly high current switches. I’ve also added an analog thumbstick (from PSP).
Note 1: As you can see, when mounting the analog stick I burned the plastic and it is visible on the outside. Also when drilling holes make sure to not overheat the plastic, it will bulge on the edges.
Note 2: You can add a lot more buttons. There’s space for it.
Electronics
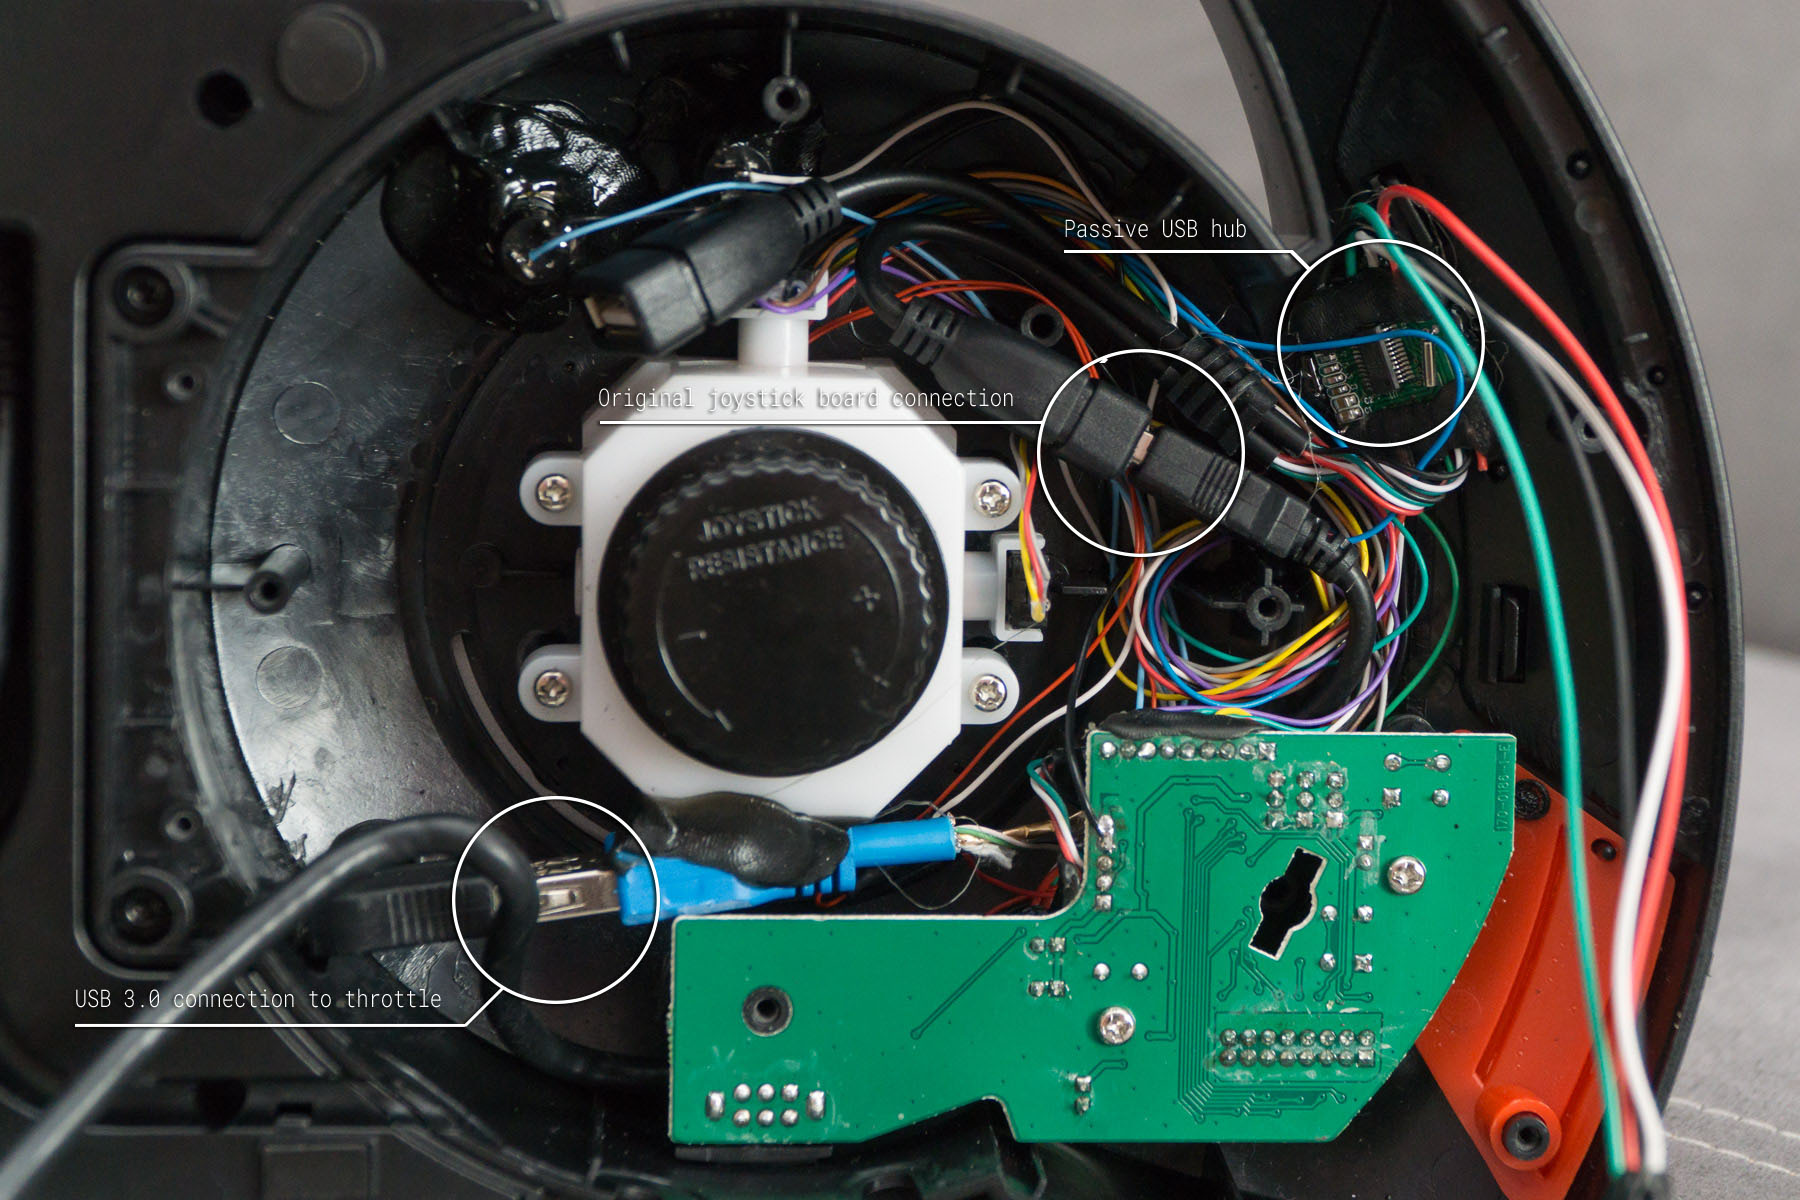
To drive all that I have used an Arduino Leonardo clone board (Pro Micro). To have it all on one USB cable I have put a passive USB hub inside the joystick base. Throttle base with the Arduino inside is connected with the joystick through an USB 3.0 connector. This allows for an easy disconnection of the two bases and easy extension should I ever decide to use them separately (I never do now). Arduino uses only two USB data wires, remaining four of the USB 3.0 cable are used for additional joystick buttons.
Note 1: Both original joystick and the Arduino share a common ground. This allows you to connect one end of the switch to the closest ground you have, so only one wire needs to get to Arduino.
Note 2: Initially I wanted to have the USB 3.0 socket neatly on the edge of the joystick, but that has made assembly impossible. Had to move the connection inside to allow flexibility.
Note 3: Turns out all that shielding on USB cables is there for a reason. Once I’ve made a tangled mess of the wires on the USB hub and the devices became unstable.
Software
Pro Micro boards have a built in USB HID interface which is recognized by the OS without any drivers. I have written a simple sketch using the Arduino Joystick library and modified the HID descriptor to remove all the unnecessary joystick buttons, axes, etc. The code is available on GitHub.
Hello
This is great – thanks a lot for posting! I played a bit with arduino some years ago. I have started playing dcs world with the same HOTAS, so this would be i nice project for me. What does common mass mean? Is it common ground?
Ole
Thank you. Yes, common ground is what I meant.
Hi, nice project! I’m going to do the same, you are using an usb hub to use the same usb cable of the HOTAS to PC? How you made the connection to this hub and what usb hub you have used?
Thanks!
Hi Marcos,
I’ve used a cheapest passive hub but I do not recommend this approach. At first it was working fine, but after PC change the joystick started lagging and freezing. In the end I had to remove the hub and run two cables to the PC… I suspect the hub was at fault. Looked like it worked differently with different PCs.
As for the connections – you simply use the USB cables. Just cut them as needed.
Hello Sir, I know it’s been several years since this article was written, but you have inspired me. I own the t.flight 4 HOTAS for PS4, but it won’t work on Star Wars Battlefront 1, and I am having a heck of a time trying to get it to work with the Titan Two adapter. I wonder if there would be a way to take the circuit board out of a Dual Shock controller and merge it with the HOTAS, to trick the PS4 into accepting all of the HOTAS inputs as if they were Dual Shock 4 inputs.?. Any ideas or input?!
Hello! This is a great idea! I’d love to make it myself one but I need some help, if possible. Thank you.